
티스토리 뷰
1. 기본 개념
1) 크롤링
: 웹 페이지를 그대로 가져와서 거기서 필요한 데이터(정보)를 추출하는 작업
2) Request & Response
HTTP
: 웹 상에서 클라이언트와 서버 간에 요청 & 응답으로 데이터를 주고 받을 수 있는 프로토콜
Methods
: 클라이언트가 서버로 보내는 요청(Request) 방법
9개의 요청 방법 중 주로 GET, POST 방식 사용
(1) GET
: 클라이언트가 서버에게 조회할 리소스를 요청. 요청 값을 URL에 담아 *쿼리스트링을 통해 전송
* 쿼리스트링 : URL 끝에 붙은 '?' 뒤의 key-value 쌍을 이루는 요청 파라미터
Ex) https://URL?name=mike&age=20 : name이 mike, age가 20일 때의 응답을 보내줘!
(2) POST
: 서버 상태를 변경하거나 값을 추가할 때 사용. 전송할 데이터를 *HTTP Body에 담아 숨겨서 전송
*HTTP Body 에는 가져온 실제 contents(HTML code 등)가 나타남
Ex) https://URL?name=mike&age=20 : (name이 mike, age가 20일 때의) 응답을 보내줘!
3) 크롤링 라이브러리


(1) BeautifulSoup
- 일반적으로 사용
- 간단한 코드, 빠른 속도
- 크롤링이 불가능한 상황이 있음 (ex. 동적 페이지)
(2) Selenium
- Chrome을 이용해 실제 페이지를 띄우고
우리가 키보드, 마우스로 하는 동작들을 자동화해주는 라이브러리
- 동적으로 활용 가능 (ex. 검색 사이트)
- 복잡한 코드, 느린 속도
2. 실습
1) 크롬 버전 확인
chrome://version/
2) 크롬 웹 드라이버 설치
https://sites.google.com/chromium.org/driver/
ChromeDriver - WebDriver for Chrome
WebDriver is an open source tool for automated testing of webapps across many browsers. It provides capabilities for navigating to web pages, user input, JavaScript execution, and more. ChromeDriver is a standalone server that implements the W3C WebDriver
sites.google.com
3) 코드 실습
(1) 필요한 라이브러리 설치
!pip3 install requests
!pip3 install bs4
!pip3 install selenium
(2) GET 방식 요청
import requests

url = '<검색어 입력 후 주소>'
res = requests.get(url)

print(res) # 응답 객체
res.text # HTML 텍스트
res.status_code # HTTP 상태 코드HTTP 상태 코드
▪ 1xx (정보): 요청을 받았으며 프로세스를 계속한다
▪ 2xx (성공): 요청을 성공적으로 받았으며 인식했고 수용하였다
▪ 3xx (리다이렉션): 요청 완료를 위해 추가 작업 조치가 필요하다
▪ 4xx (클라이언트 오류): 요청의 문법이 잘못되었거나 요청을 처리할 수 없다
▪ 5xx (서버 오류): 서버가 명백히 유효한 요청에 대해 충족을 실패했다
(3) BeatifulSoup
# 임시 html 텍스트
html = '''
<html>
  <head>
    <title>Example HTML</title>
  </head>
  <body>
    <div id='first' class='Example'>
      <h3 title='Good Content Title'>Contents Title</h3>
      <p>Test contents</p>
    </div>
    <div id='second' class='Example'>
      <p>Text1</p>
      <p>Text2</p>
      <p>Text3</p>
    </div>
  </body>
</html>
from bs4 import BeautifulSoup
# 첫 번째 인자: 파싱할 객체
# 두 번째 인자: 사용할 parser(구문 분석기)
soup = BeautifulSoup(html, 'html.parser')
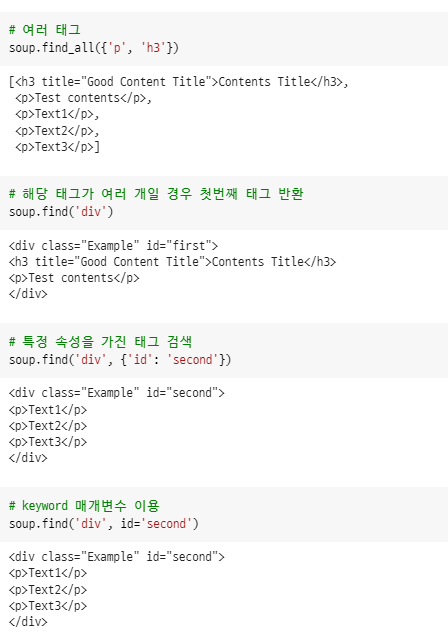
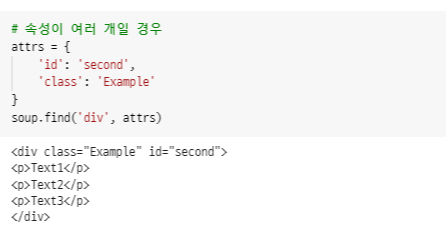
find(), find_all()
: 태그 검색
- find(tag, attributes, recursive, text, keywords)
- find_all(tag, attributes, recursive, text, limit, keywords)
get_text()
: 태그 내 텍스트 반환 (부모 태그의 경우 자식 태그의 텍스트 모두 반환)
BeautifulSoup의 첫 번째 인자인 파싱할 객체는 텍스트로 바꿔서 넣어줘야 함

🏳️🌈 [Ex] 네이버 검색 데이터 추출
url = 'https://search.naver.com/search.naver?where=nexearch&sm=top_hty&fbm=1&ie=utf8&query=%EC%A0%9C%EC%A3%BC%EB%8F%84'
res = requests.get(url) # get 방식으로 요청해 얻은 응답 객체

# 첫 번째 인자 : 파싱할 객체 (텍스트로 넣어줘야 함)
# 두 번째 인자 : 사용할 parser (구문 분석기)
soup = BeautifulSoup(res.text, 'html.parser')

title = soup.find('a')
title.get_text()
>>> '메뉴 영역으로 바로가기'

# keyword로 class를 사용할 때는 _를 붙여주기 (파이썬의 클래스와 중복 방지)
title = soup.find_all('span', class_="fix")
all_title = [item.get_text() for item in title]
all_title
>>> ['@txt@', '@txt@', '@txt@', '@query@ @intend@']
(4) Selenium
from selenium import webdriver
from selenium.webdriver.common.keys import Keys

# path 변수에 자신의 chromedriver가 있는 파일 위치를 할당
# window : ~/chromedriver.exe
# mac : ~/chromedriver (.exe 빼기)
path = 'C:/Users/bluea/chromedriver.exe'
driver = webdriver.Chrome(path)

driver.get('https://www.naver.com/')

search = driver.find_element_by_id('query') # id 속성으로 검색창 찾기
search.send_keys('제주도') # 검색어 입력
search.send_keys(Keys.RETURN) # Keys.RETURN = Enter 입력
search = driver.find_element_by_link_text('이미지') # a 태그의 텍스트로 찾기
search.click() # 클릭
implicitly_wait()
: webdriver에 영구적으로 작용되는 암시적 대기 방식
- 찾으려는 elemet가 로드될 때까지 지정한 시간(5초)만큼 대기하도록 설정
- Selenium 사용 시 브라우저에서 해당 웹 페이지의 요소들을 로드하는 데 시간이 좀 걸리기에
element가 존재하지 않는다는 error 발생할 수 있음 → 해당 요소가 전부 준비될 때까지 대기
driver.implicitly_wait(time_to_wait=5)
CSS Selector
: HTML 요소를 선택해주는 요소
▪ 태그 선택자
▪ 클래스 선택자(.)
▪ ID 선택자(#)
▪ 자식 선택자(>)
▪ 하위 선택자( )
🏳️🌈 [Ex] cine21 배우 랭킹 사이트 크롤링
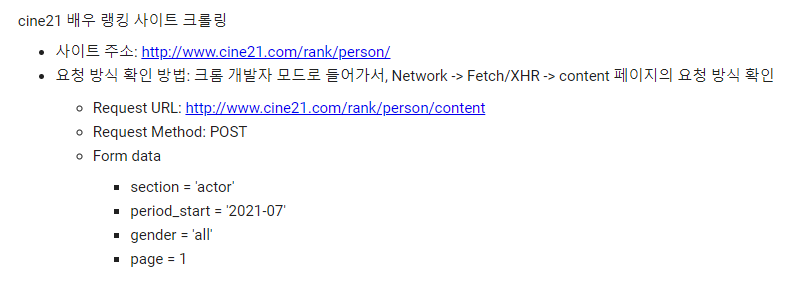
(1) GET 방식 요청
→ 배우 리스트가 응답으로 반환되지 X (사이트마다 다름)
import re
import requests
from bs4 import BeautifulSoup

cine21_url = 'http://www.cine21.com/rank/person/'
res = requests.get(cine21_url)
print(res.text)
(2) POST 방식 요청
dict() : form data 생성
request.post(<요청 url>, data = <form data>) : 크롤링 주소 요청
cine21_url = 'http://www.cine21.com/rank/person/content'
post_data = dict()
post_data['section'] = 'actor'
post_data['period_start'] = '2022-01'
post_data['gender'] = 'all'
post_data['page'] = 1

res = requests.post(cine21_url, data=post_data)
soup = BeautifulSoup(res.text, 'html.parser')(3) 배우 이름 추출
select()
: find_all()과 동일한 작동(태그 검색)을 하는 함수
차이점은 파라미터로 css selector를 사용 (좀 더 간편)
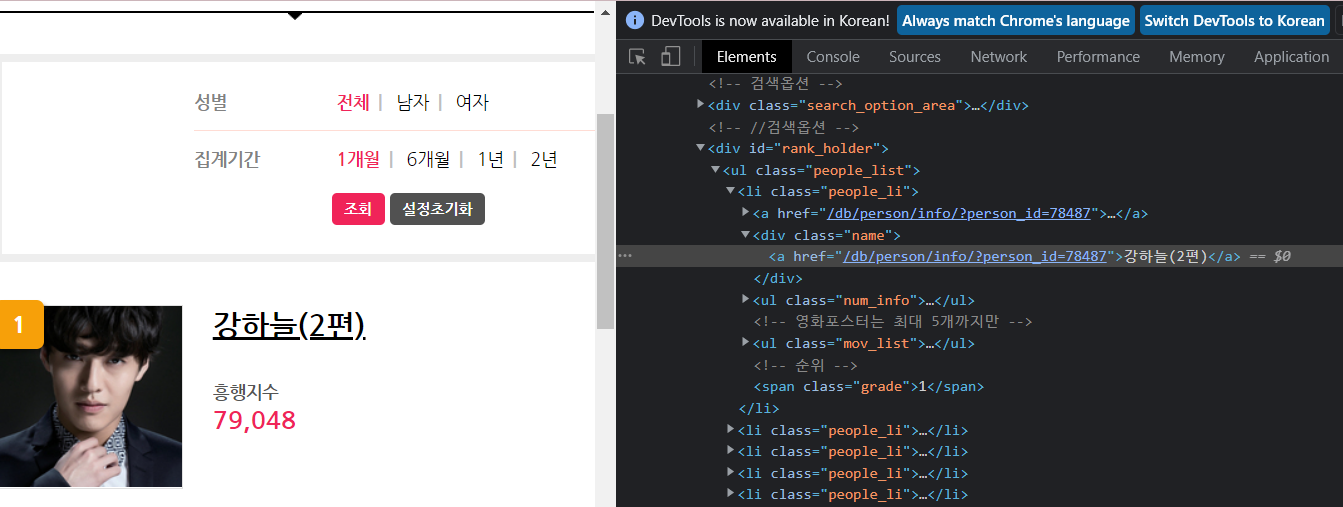
# class가 people_li인 li 태그 중 class가 name인 div 태그 list
soup.select('li.people_li div.name')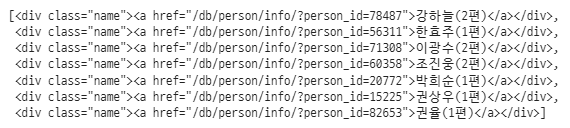
actors = soup.select('li.people_li div.name')
for actor in actors:
    print(actor.text)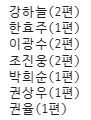
re.sub('<정규표현식>', '<치환문자(공백)>', '<대상 문자열>')
: 이름만 남기기 위해 정규표현식을 통해 치환
\w : 문자, 숫자와 매치 . Unicode = 숫자, underscore(_)를 포함하는 모든 언어의 표현가능한 문자
test_data = '조우진(2편)'
re.sub('\(\w*\)', '', test_data)
>>> '조우진'
actors = soup.select('li.people_li div.name')
for actor in actors:
print(re.sub('\(\w*\)', '', actor.text))
(4) 배우 상세 정보 추출
select _one()
: find()와 동일한 작동(태그 검색)을 하는 함수
actors = soup.select('li.people_li div.name')
for actor in actors:
    print (actor.select_one('a'))
actors = soup.select('li.people_li div.name')
actors_info_list = list()

for actor in actors:
    actor_link = 'http://www.cine21.com' + actor.select_one('a')['href'] # 태그 내 속성 접근
    response_actor = requests.get(actor_link) # 배우 상세 페이지 이동
    soup_actor = BeautifulSoup(response_actor.text, 'html.parser')
    default_info = soup_actor.select_one('ul.default_info')
    actor_details = default_info.select('li')
    print(actor_details)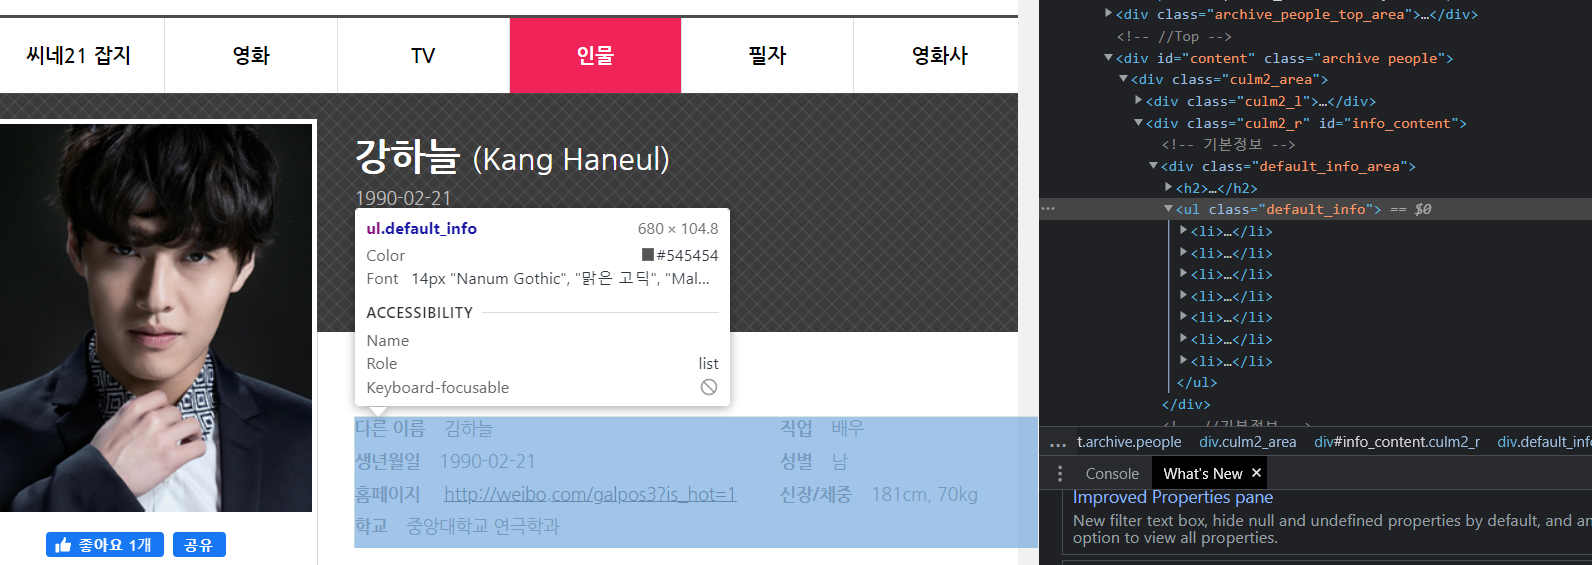
배우마다 가지고 있는 상세 정보가 다름
→ dictionary 로 저장!
actors = soup.select('li.people_li div.name')
actors_info_list = list()
for actor in actors:
actor_link = 'http://www.cine21.com' + actor.select_one('a')['href'] # 태그 내 속성 접근
response_actor = requests.get(actor_link) # 배우 상세 페이지 이동
soup_actor = BeautifulSoup(response_actor.text, 'html.parser')
default_info = soup_actor.select_one('ul.default_info')
actor_details = default_info.select('li')
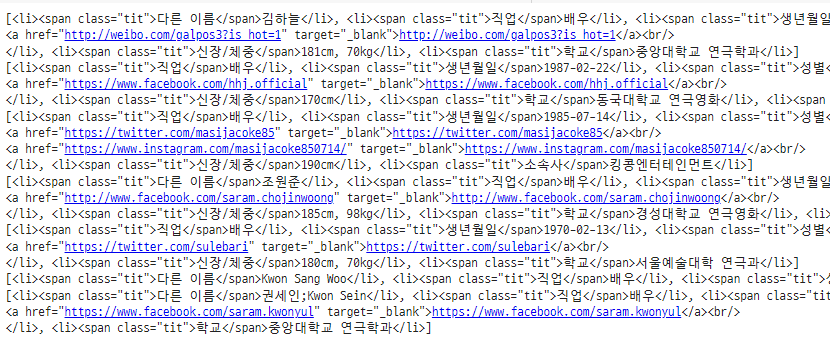
actor_info_dict = dict()
for actor_detail in actor_details:
actor_detail_key = actor_detail.select_one('span.tit').text # 상세정보 key값
actor_detail_value = re.sub('<span.*>.*</span>', '', str(actor_detail)) # span 태그 제거
actor_detail_value = re.sub('<.*?>', '', actor_detail_value) # 상세정보 value값
actor_info_dict[actor_detail_key] = actor_detail_value
actors_info_list.append(actor_info_dict)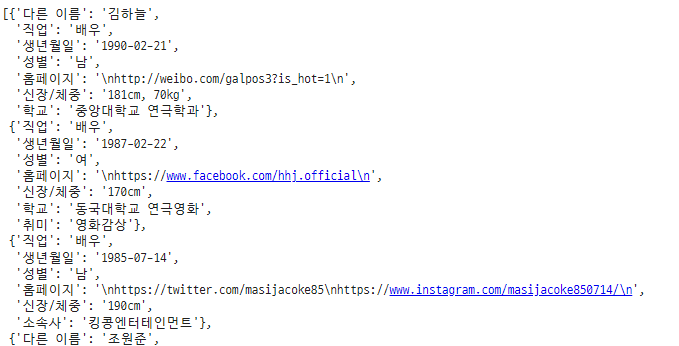
이름(배우명)까지 추가한 코드
actors_info_list = list()
actors = soup.select('li.people_li div.name')

for index, actor in enumerate(actors):
    actor_info_dict = dict()
    actor_name = re.sub('\(\w*\)', '', actor.text)
    actor_info_dict['이름'] = actor_name

    actor_link = 'http://www.cine21.com' + actor.select_one('a')['href']
    response_actor = requests.get(actor_link)
    soup_actor = BeautifulSoup(response_actor.text, 'html.parser')
    default_info = soup_actor.select_one('ul.default_info')
    actor_details = default_info.select('li')

    for actor_detail in actor_details:
        actor_detail_key = actor_detail.select_one('span.tit').text
        actor_detail_value = re.sub('<span.*>.*</span>', '', str(actor_detail))
        actor_detail_value = re.sub('<.*?>', '', actor_detail_value)
        actor_info_dict[actor_detail_key] = actor_detail_value

    actors_info_list.append(actor_info_dict)

actors_info_list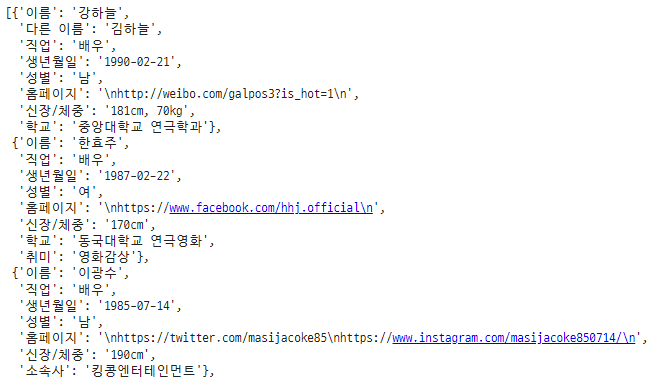
'Data > Engineering' 카테고리의 다른 글
| [DE] Cloud Computing (AWS/AZURE/GCP) (0) | 2022.02.11 |
|---|---|
| [DE] Git (0) | 2022.01.11 |
| [DE] Linux (0) | 2022.01.09 |